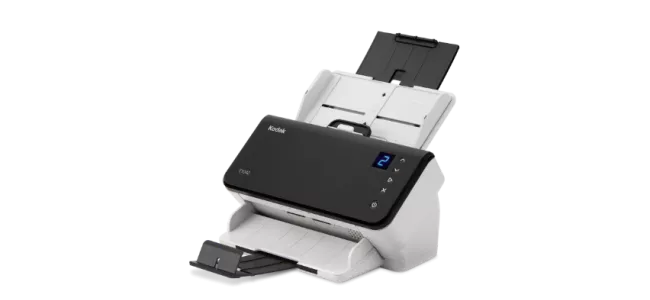
Register Your Scanner

Register your scanner now to get the most out of your investment.

Get Started

Image
SCANMATE i940 Scanner Banner

Drivers & Software

License Agreement

License Agreement

By downloading from Kodak Alaris, you agree to the terms & conditions outlined in the license agreement. Actual file size for multilanguage downloads may vary.

Windows Drivers

Windows Drivers 

The installation process can be complex. Please read the release notes before downloading. By downloading from Kodak Alaris, you agree to the terms & conditions outlined in the license agreement. Actual file size for multilanguage downloads may vary. 

Operating systems tested on: 

Go to specifications for complete list, review release notes for details. 

Version: 8.7 

Windows Full CD Windows (driver only)

KODAK i900 Series Scanner Drivers - Linux

KODAK i900 Series Scanner Drivers - Linux 

NOTE: LINUX drivers are not valid for the KODAK i920 Scanner. Download 32-bit and 64-bit LINUX Drivers for the KODAK ScanMate i940 Scanner only. 

Operating systems tested on: 

  • Operating systems tested on:
  • (Intel/AMD x86/x64 processors only)
  • Ubuntu 18.04 64-bit
  • Ubuntu 16.04 64-bit and 32-bit
  • Open SUSE 11.3 (i586) 32-bit
  • Open SUSE LEAP 15.1 64-bit
  • SUSE Linux Enterprise Desktop 12.2 64-bit
  • SUSE Linux Enterprise Desktop 15 SP5 for 64-bit
  • Neokylin-NKLD-V7_U2-ZX64-REL-build54
  • NeoKylin-Live-Desktop-6.0-x86_64-B060-20160822
  • NeoKylin-Linux-Desktop-6.0-x86_64-B045-20141201 64-bit
  • NeoKylin-Linux-Desktop-6.0 i586 

32-bit 32-bit and 64-bit LINUX Driver files do not include Guides. Expand the file (e.g., tar -xf *.gz) and then run the setup script (i.e. sudo ./setup) 

Version: 7.1

Deb Linux 32 Bit RPM Linux 32 BitDeb Linux 64 Bit RPM Linux 64 Bit

KODAK Capture Pro Software Limited Edition

Capture Pro Software Limited Edition

Capture and index your critical data and send smarter information to ECM systems and business applications to streamline your workflows and processes. 

Request Software

Smart Touch for KODAK i900 Series Scanners

Smart Touch for KODAK i900 Series Scanners 

Smart Touch software allows you to easily create searchable PDF's (or other types of images) and send the document to a file location or common cloud services with the touch of a button.

Please read the release notes before downloading. By downloading from Kodak Alaris, you agree to the terms & conditions outlined in the license agreement. 

Request Software

Kofax VRS Support

Kofax VRS Support 

The KODAK ScanMate i940 Scanner has been certified by Kofax with the following VRS versions: 

For more information see the Kofax Scanner Configurator. 

Version: 5.1

Download

Developer Toolkit

Developer Toolkit 

Kodak Alaris has several integration options for our scanners. We have traditional thick client integration options with our TWAIN and ISIS and WIA drivers as well as an easy to use Scanner SDK. 

We also have a state of the art RESTful Web API for integration to our network enabled scanners from any platform without installing host drivers. 

Request information

Manuals & Guides

FAQs

Do you want to get the most from our products? Read frequently asked questions about this product.

Using
How can I obtain professional services and support for the scanner?

For information on how to contact Kodak Alaris support, please visit Kodak Alaris Services and Support.

How do I check the SVT/Driver version?
  1. Open ControlPanel > Add and Remove Programs (XP) or, Programs and Features (Vista &7).
  2. Scroll down to Kodak [Scanner Model] Scanner
  3. Vista and 7 – The version is in the far right column. Note the version.
  4. XP - Click the ‘Click here for support information’ link. Note the version.
How do I use Smart Touch?

Refer to the User's Guide for Smart Touch for information about using this software.

Maintaining
How can I improve Image quality?

Clean Scanner using procedure documented below:

CAUTION:

  • Do not use air, liquid or gas spray cleaners or other household cleaners.
  • Do not use cleaners on hot surfaces.
  • Allow surfaces to cool to ambient temperature before use.
  • Use adequate ventilation. Do not use cleaners in confined areas.
  1. Disconnect the power cord from the scanner before cleaning any of the internal parts.
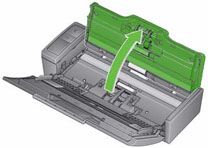
  2. Open the top cover.
  3. Open the scanner cover.
    Image

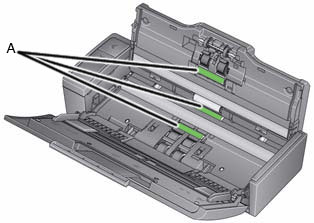
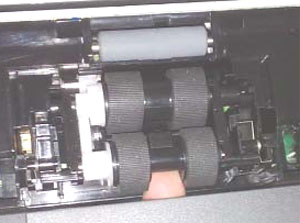
  4. Wipe the three feed rollers - A from side to side with a roller cleaning pad. Rotate the rollers to clean the entire surface.
    Image
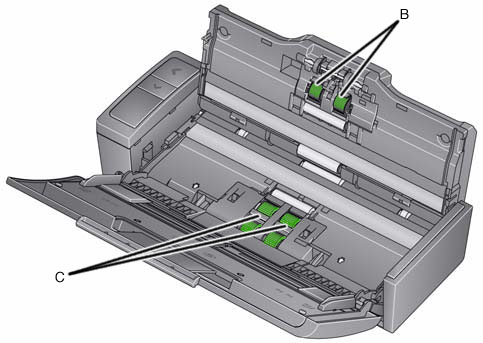
  5. Wipe the separation rollers - B from side to side with a roller cleaning pad. Rotate the rollers to clean the entire surface.
  6. Wipe the feed module tires - C from side to side with a roller cleaning pad. Rotate the rollers to clean the entire surface.
    Image
    NOTE: For more information about cleaning your scanner, see the user guide that came with your product.
  7. Connect the power cord to the scanner.
  8. Close the scanner cover.
  9. Scan your document(s).
How do I replace the feed module for my SCANMATE i940 Scanner?

Removing the feed module:

  1. Open the top cover.
  2. Open the scanner cover.
    Image
  3. Disconnect the power from the scanner.
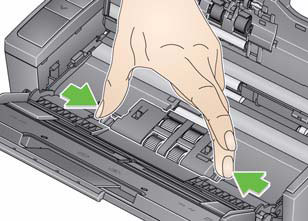
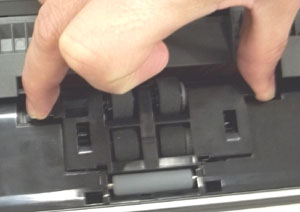
  4. Remove the feed module cover:
    • Squeeze the tabs on each side of the fed module cover.
      Image
    • Lift and remove the feed module cover.
      Image
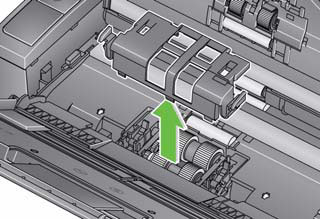
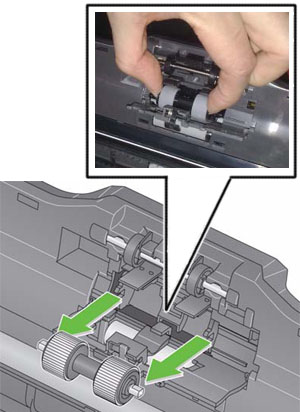
  5. Remove the feed module:
    • Push up from the bottom to rotate the feed module.
      Image
    • Lift one side, then remove the feed module.
      Image

Installing the feed module:

  1. Insert on side of the feed module shaft into the slot in the frame.
    Image
  2. Insert the other side and push on the feed module to seat it.
  3. Align feed module cover with the opening in the frame.
  4. Press on the feed module cover to seat it.
    Image
  5. Close the scanner cover.
  6. Connect the power to the scanner.
How do I replace the separation roller for my SCANMATE i940 Scanner?

Removing the separation roller:

  1. Disconnect the power from the scanner.
  2. Open the top cover.
  3. Open the scanner cover.
    Image
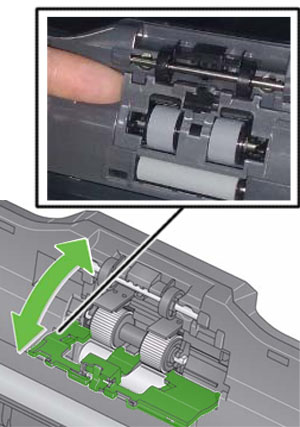
  4. Pry open the separation roller cover with your finger nail.
    Image
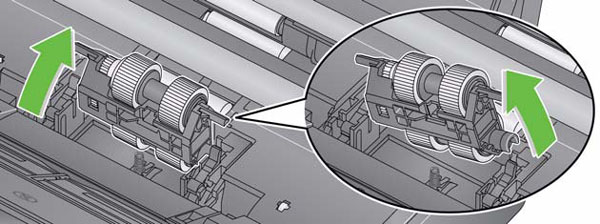
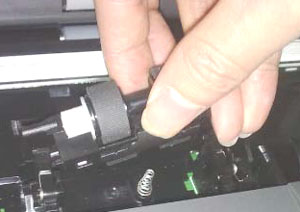
  5. Remove the separation roller:
    • Hold the separation roller on the outer edges with your thumb and pointing finger.
    • Pull the separation roller to remove it.
      Image

Installing the separation roller:

  1. Insert the separation roller with the flat sides of the shaft aligned with the slots in the frame.
    Image
  2. Push on the separation roller to seat it.
  3. Close the separation roller cover.
    Image
  4. Close the scanner cover.
  5. Connect the power to the scanner.
How do I resolve an error code E4 (Scanner error)?

Restart the scanner:

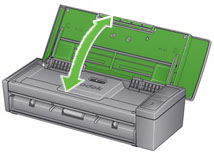
  1. Close the top cover.
  2. Open the top cover.
    Image
  3. Restart the scanning application and resume scanning.
How do I resolve an error code U6 (Scanner cover open error)?

Close the scanner cover.

Image

How do I resolve an error code U8 ( Multifeed error)?
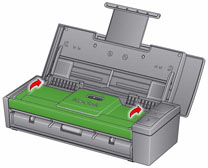
  1. Open the scanner cover.
    Image
  2. Remove the multifed documents.
  3. Change the driver window to the type of paper you are using.
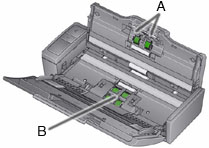
  4. Check that the following are clean and not worn:
    • Separation rollers - A
    • Feed rollers - B
      Image
  5. Close the scanner cover.

    IMPORTANT: Verify that the documents you are scanning meet the following specifications:
    • Acceptable Paper Weight: 4.9 to 14.5 g/m2 (10.7 to 32 lbs.)
    • Maximum document size: 21.6 x 165.1 cm (8.5 x 65 in.)
    • Minimum document size: 8.0 x 5.2 cm (3.15 x 2.05 in.)
    • Maximum number of documents in the input tray is 20

  6. Align and load the documents again. Do not load more then 20 documents in the input tray.
  7. Move the guides until they just touch the edge of the document.
    Image
  8. Restart the scanning application and resume scanning.
How do I resolve an error code U9 (Paper jam or unexpected error)?

IMPORTANT: The U9 error occurs when there is a paper jam in the scanner. This error can also occur when something unexpected happens like the loss of power during scanning. With some older computer operating systems when you use the scanner without the power supply, a power starvation situation can occur.

Did a blank sheet exit the scanner while you were scanning?

----------------------------------------------------IF YES--------------------------------------------------

  1. Open the scanner cover.
  2. Remove the documents that are being scanned.
  3. Close the scanner cover.
    Image
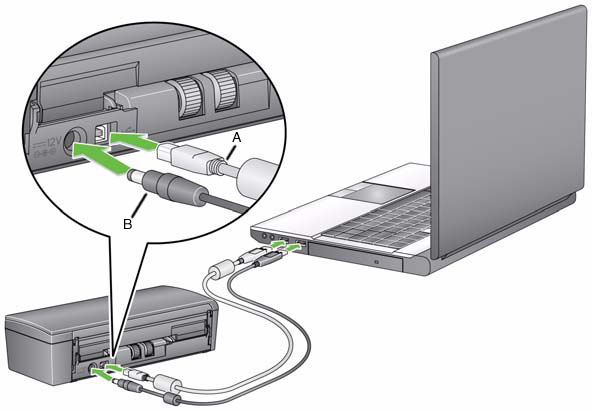
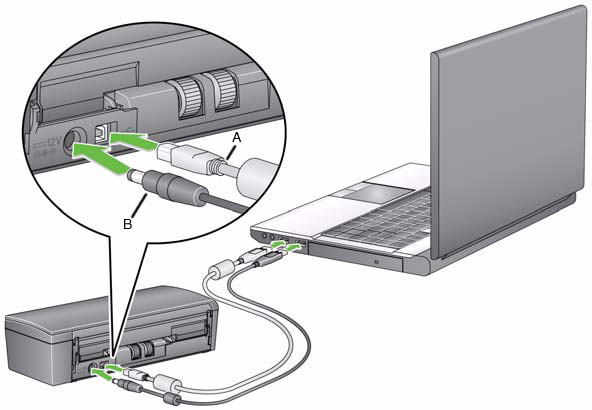
  4. Check the USB connections between the scanner and your computer. If you are only using one USB cable (B), connect the other USB cable (A) between your scanner and computer.
    Image
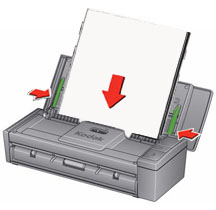
  5. Align the documents and load them into the input again.
  6. Move the guides until they just touch the edge of the document.
    Image
  7. Restart the scanning application and try to scan again.

----------------------------------------------------IF NO ---------------------------------------------------

  1. Open the scanner cover.
  2. Remove the documents that are being scanned.
    Image
  3. Clear the paper jam:
    • Inspect the inside of the scanner for bits of paper or other foreign objects.
    • If necessary, clean:
      • Separation rollers - A
      • Feed module - B
        Image
  4. Inspect the inside of the scanner and clean it if necessary.
  5. Close the scanner cover.

    IMPORTANT: Verify that the documents you are scanning meet the following specifications:
    • Acceptable Paper Weight: 4.9 to 14.5 g/m2 (10.7 to 32 lbs.)
    • Maximum document size: 21.6 x 165.1 cm (8.5 x 65 in.)
    • Minimum document size: 8.0 x 5.2 cm (3.15 x 2.05 in.)

  6. Align the documents and load them into the input again.
  7. Move the guides until they just touch the edge of the document.
    Image
  8. Restart the scanning application and resume scanning.
How do I update a driver?
  1. Go to the Drivers and Downloads page located here to find the latest drivers.
  2. For detailed instructions on how to install a scanner, please refer to Section 2 of the User's Guide.
What do I do if my scans have clipped corners?

IMPORTANT: If a sheet is not fed evenly from the input tray, the scan may skew and the corners of the image may get clipped off during the scanning process.

Do the following for best results when loading documents into the scanner:

  1. Verify that all inks and correction fluids are dry.
  2. Remove any staples or paper clips.
  3. Align the leading edges of the sheets.
  4. Load the sheets so they are centered in the input tray with the side to be scanned facing away from you.
  5. Move the side guides until they just touch the edges of the sheets.
    Image
  6. Scan your document(s).
What supplies and consumables are available for scanners from Kodak Alaris?

For information about available materials, see the Supplies & Consumables Catalogue for Kodak Alaris

Troubleshooting
What do I do if my scanner is running slowly?
  • Your host PC may not meet the minimum requirements for the scanner. See Appendix A, Specifications, in the User’s Guide.
  • Some image processing functions can reduce scanner speed.
  • Your resolution (dpi) for image output may be too high.
  • Your compression setting may be too low.
  • Your anti-virus software may be scanning all TIFF or JPEG files.
  • Check that you are scanning to a local drive.
What if my computer does not recognize my scanner?

Verify that the USB cable is seated into a USB port on the computer and on the scanner.

SCANMATE i940 USB connections


Check the connections:

  1. Connect the power cord and verify that it is completely seated into the power connector on the back of the scanner.
  2. Connect the power cord plug into a working power outlet.
    NOTE: If a wall switch or power strip are used, verify that they are turned on.
  3. Open the top cover.

Is the green greater-than LED > glowing continuously?

If No

Verify that the power outlet is working properly.

  1. Remove the scanner power cord from the power outlet.
  2. Plug another device into the power outlet.

Supplies & Consumables

Contact your Reseller to purchase supplies and consumables. If you don't know who your reseller is, please contact us.

Contact Us

Ask a Question 

Have a question? Fill out the information and someone will contact you soon.

Explore More

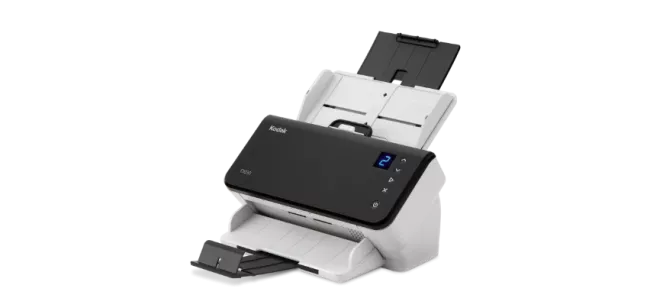
E1030 Scanner

Image
E1030 Scanner

E1030 Scanner

  • 30ppm | 80 Sheet ADF
  • Affordable and practical
  • Largest feeder in its class
  • Dual Light Illumination (DLI)
  • 9 Quick Scan Jobs

E1040 Scanner

Image
E1040 Scanner

E1040 Scanner

  • 40ppm | 80 Sheet ADF
  • Affordable and practical
  • Largest feeder in its class
  • Dual Light Illumination (DLI)
  • 9 Quick Scan Jobs